
Cheddar Rice Krispie Crackers Recipe
Introduction
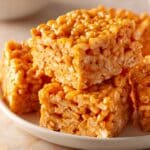
Rice Krispie Cheddar Crackers are a simple and delicious snack that combines the crunch of Rice Krispies with the sharpness of cheddar cheese. Perfect for a quick treat or a party appetizer, these crackers are easy to make with just a few ingredients.

Ingredients
- 4 cups Rice Krispies cereal
- 1 cup shredded sharp cheddar cheese
- 3 tablespoons unsalted butter
Instructions
- Step 1: Preheat your oven to 350°F (175°C) and line a baking sheet with parchment paper.
- Step 2: In a medium bowl, combine the Rice Krispies and shredded cheddar cheese.
- Step 3: Melt the butter in a small saucepan over low heat or in the microwave until fully melted.
- Step 4: Pour the melted butter over the Rice Krispies and cheese mixture and gently stir until well coated.
- Step 5: Spread the mixture evenly on the prepared baking sheet, pressing down slightly to form a flat layer.
- Step 6: Bake for 10-12 minutes, or until the crackers are golden brown and crispy.
- Step 7: Remove from the oven and allow to cool completely before breaking into cracker-sized pieces.
Tips & Variations
- For extra flavor, add a pinch of garlic powder or smoked paprika to the mixture before baking.
- Use aged cheddar for a more intense cheese taste.
- Try mixing in some finely chopped fresh herbs like rosemary or thyme for a fresh twist.
- If you prefer a softer texture, reduce baking time by a couple of minutes.
Storage
Store the crackers in an airtight container at room temperature for up to one week to maintain their crispness. If they lose their crunch, reheat them in a low oven (around 300°F or 150°C) for a few minutes to crisp them up again.
How to Serve
Serve this delicious recipe with your favorite sides.
FAQs
Can I use other types of cereal instead of Rice Krispies?
Yes, cereals with a similar light and crispy texture work best, but the flavor and texture may vary slightly.
Can I make these crackers ahead of time?
Absolutely! Prepare and bake them in advance, then store in an airtight container until ready to serve.
PrintCheddar Rice Krispie Crackers Recipe
This simple and delicious recipe combines the crunchy texture of Rice Krispies with the savory flavor of cheddar cheese and butter to create homemade cheddar crackers. Perfect as a snack or appetizer, these crackers are easy to prepare and bake until golden and crispy.
- Prep Time: 5 minutes
- Cook Time: 15 minutes
- Total Time: 20 minutes
- Yield: About 24 crackers 1x
- Category: Snack
- Method: Baking
- Cuisine: American
Ingredients
Ingredients
- 3 cups Rice Krispies cereal
- 1 cup shredded sharp cheddar cheese
- 3 tablespoons unsalted butter, melted
Instructions
- Preheat Oven: Preheat your oven to 350°F (175°C) to prepare for baking the crackers.
- Combine Ingredients: In a large bowl, mix together the Rice Krispies cereal, shredded cheddar cheese, and melted butter until all ingredients are evenly coated and combined.
- Arrange on Baking Sheet: Spread the mixture evenly onto a parchment-lined baking sheet, pressing gently to form a thin, uniform layer.
- Bake: Place the baking sheet in the oven and bake for 10-15 minutes, or until the crackers are golden brown and crispy. Keep an eye on them to avoid burning.
- Cool and Serve: Remove from the oven and allow the crackers to cool completely on the baking sheet before breaking them into pieces and serving.
Notes
- You can adjust the amount of cheddar cheese for a sharper or milder flavor.
- Use parchment paper or a silicone baking mat to prevent sticking.
- Store baked crackers in an airtight container for up to 3 days to maintain freshness.
- For extra flavor, consider adding a pinch of garlic powder or paprika to the mixture before baking.
Keywords: Rice Krispie crackers, cheddar crackers, homemade snacks, baked crackers, easy snack recipe